TL;DR
In this tutorial, we take the basic movement-to-video system from episode 1 and turn it into a more artistic and spatial interactive installation. Instead of just building the patch, the focus is on creative use, video choice, and real-world setup.
Get the Max patch HERE
If you prefer text, below you find a list of the video’s key concepts, with images.
Overview
The core system stays the same as Ploc’ 1.0:
Movement from a camera → controls video speed in real time
But in this episode, we explore:
- How to choose the right video for the situation
- How to design the interaction feel
- How to set up a physical space (projection, camera, lighting)
The goal: move from technical demo → meaningful interactive piece
What we use
-
ste.snips snippet package
-
A video that fits the interaction and the space
-
Projector
-
Sound Speakers
-
Lights
-
Moving body
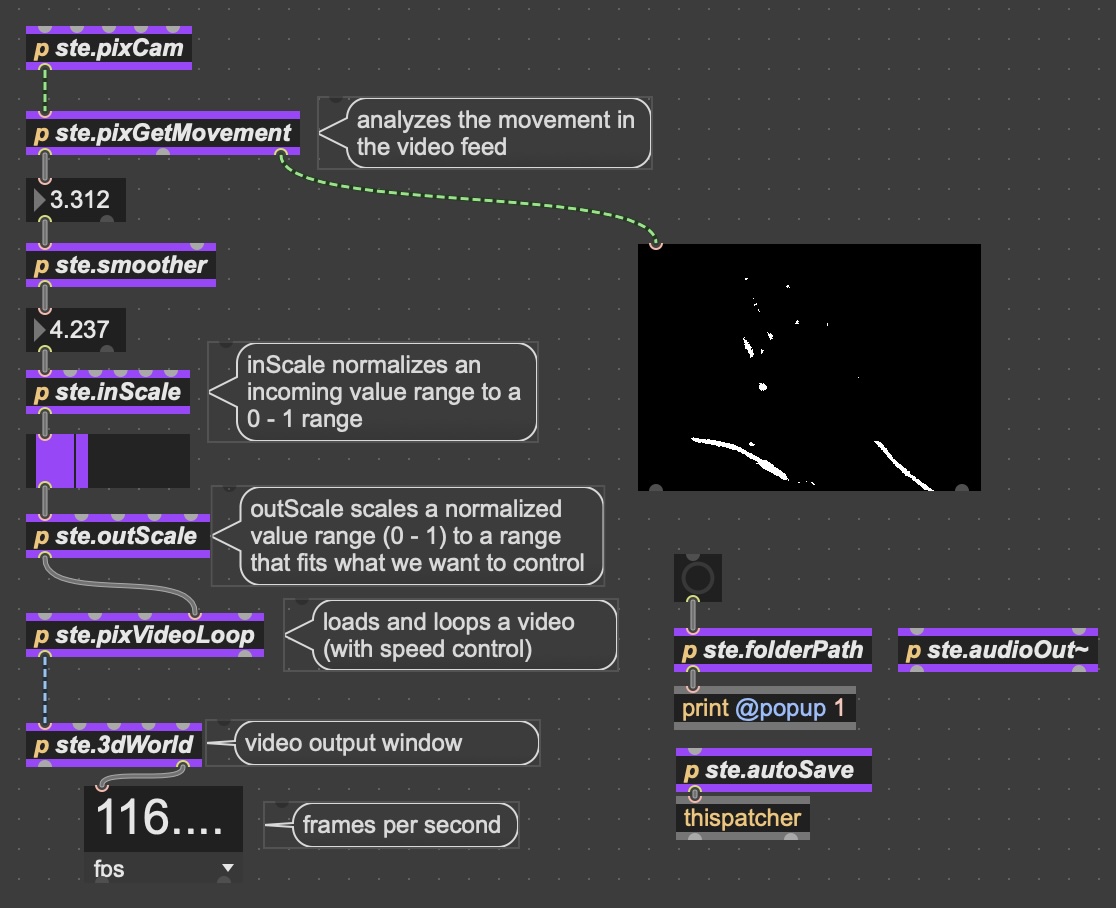
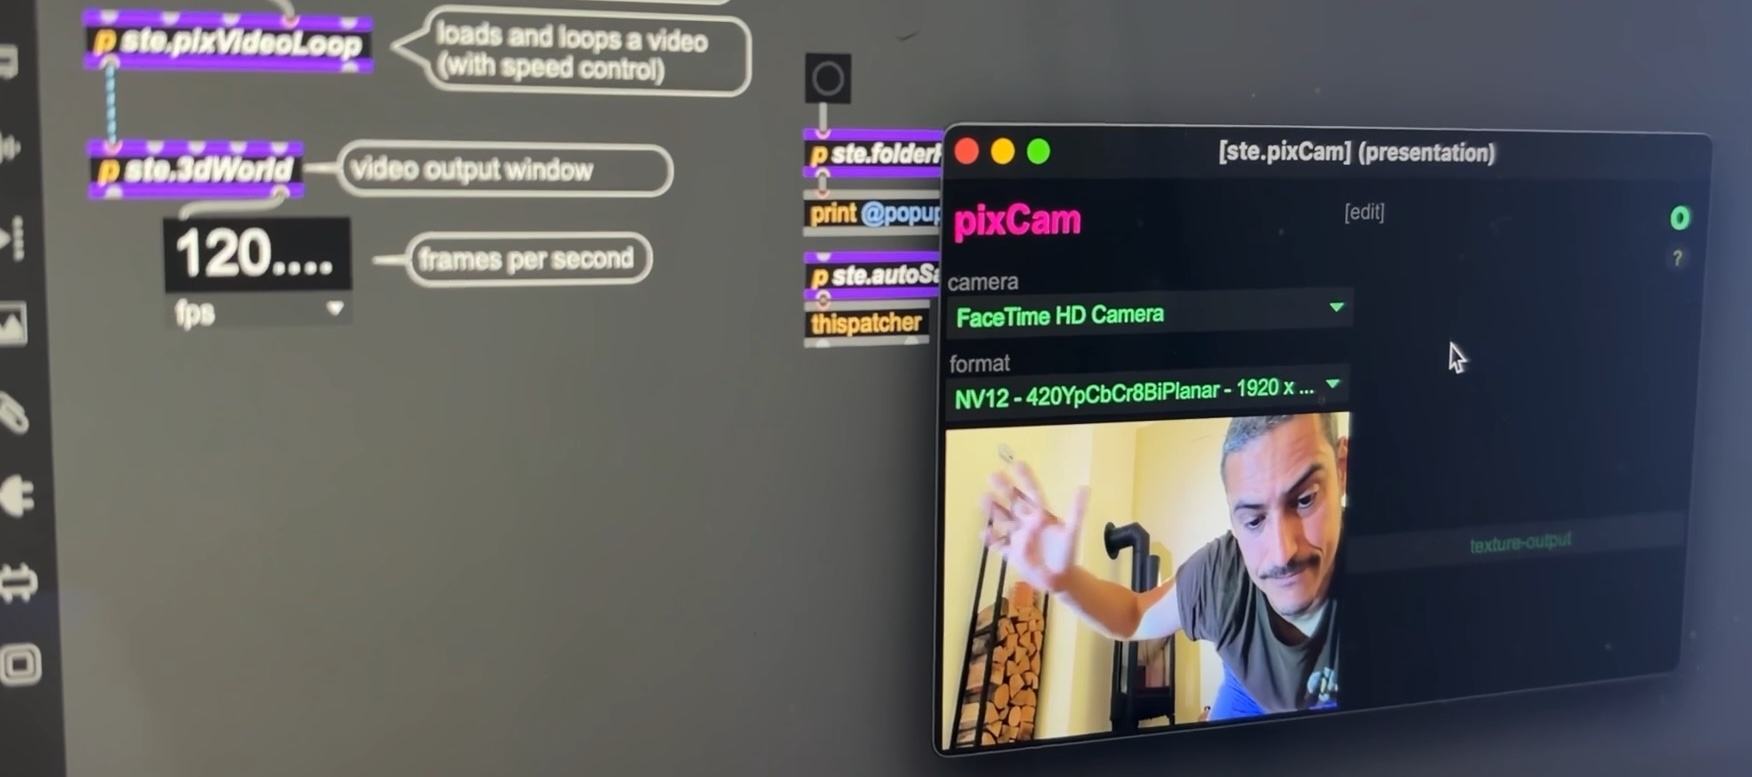
System Recap
We start from the existing patch of Ploc’ 1.0
- Movement is tracked via camera
- Movement value → controls video speed
- Video responds in real time
Then we replace the video with a new custom one.
Choosing the Right Video
Not every video works well for this kind of interaction and spatial situation.
Key principles:
1. Consistent Movement
- The motion inside the video should have a steady pace
2. Clean Looping
- First and last frames should match
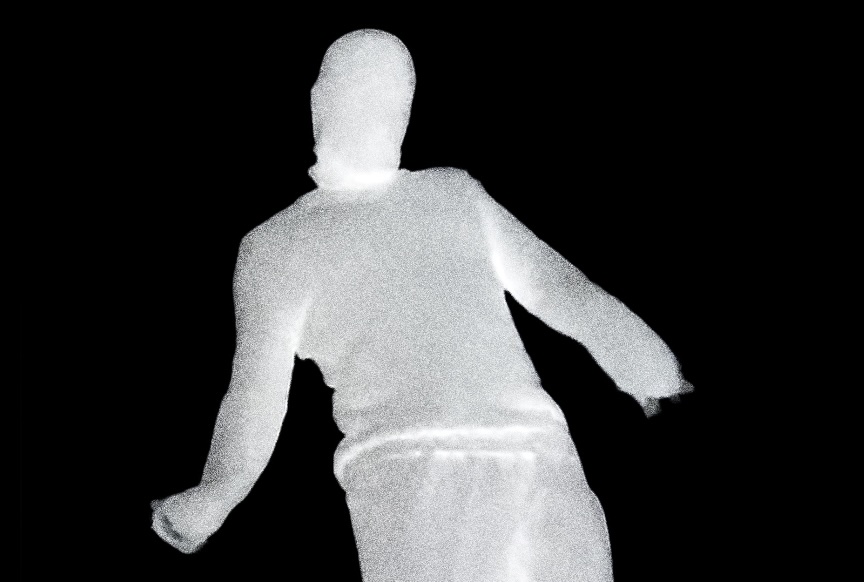
3. Black Background
- Helps isolate the subject in projection
4. Composition
- Align elements (e.g., feet) with physical space
Project Organization
Always keep your patch and media together:
- Create a project folder
- Save your patch inside
- Store video files in the same location
Max's Projects files
Max itself offers a “Project” file format you can use:
- It organizes files for you
- It has a specific folder structure
- It makes it easy to share your project
- it is an overkill for simple projects
- It might feel overwhelming if you are just starting with Max
Could be interesting for you in the future
Patch Clarity
Use comment boxes (C in Max):
- Label sections
- Explain functionality
- Help future you understand the patch
Bonus:
- Use inspector → style comments (e.g., bubbles)
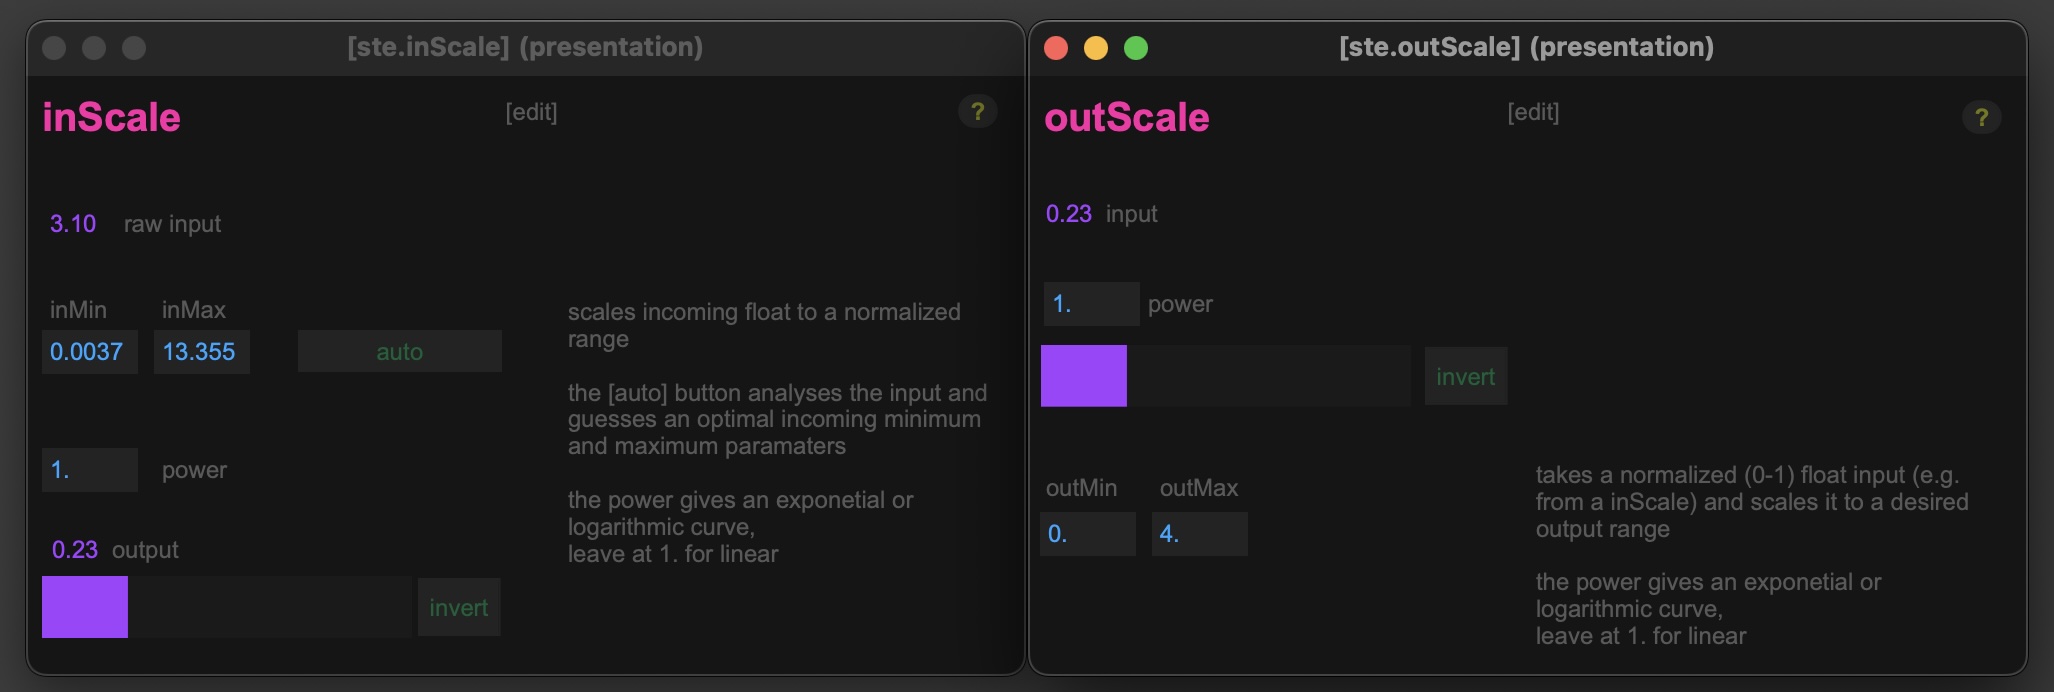
Scaling Refresher (Important)
Input Scaling (inScale)
- Normalize movement → range 0 to 1
- Use auto calibration:
- Stay still → minimum
- Move → maximum
Output Scaling (ste.outScale)
- Map normalized values → video speed range
- Choose different ranges depending on how you want the video to react
Examples
- 0 - 1
- no movement = stop (0)
- max movement = normal video speed (1)
or
- 0.5 - 5
- no movement = half video speed (0.5)
- max movement = very fast video speed (5)
Interaction Design
Small parameter changes = big impact
You can:
- Adjust effort required
- Control precision and expressiveness
- Shape the feeling of interaction
Inversion
- Normal → move = video speeds up
- Inverted → move = video slows down
Creates a completely different interaction logic.
Sound as Feedback
If your video includes audio the interaction feels more immersive and the movement becomes “audible”
Audio Output
Make sure your audio device is correctly set in Max
you find the sound settings in the menu bar: Options / Audio Status
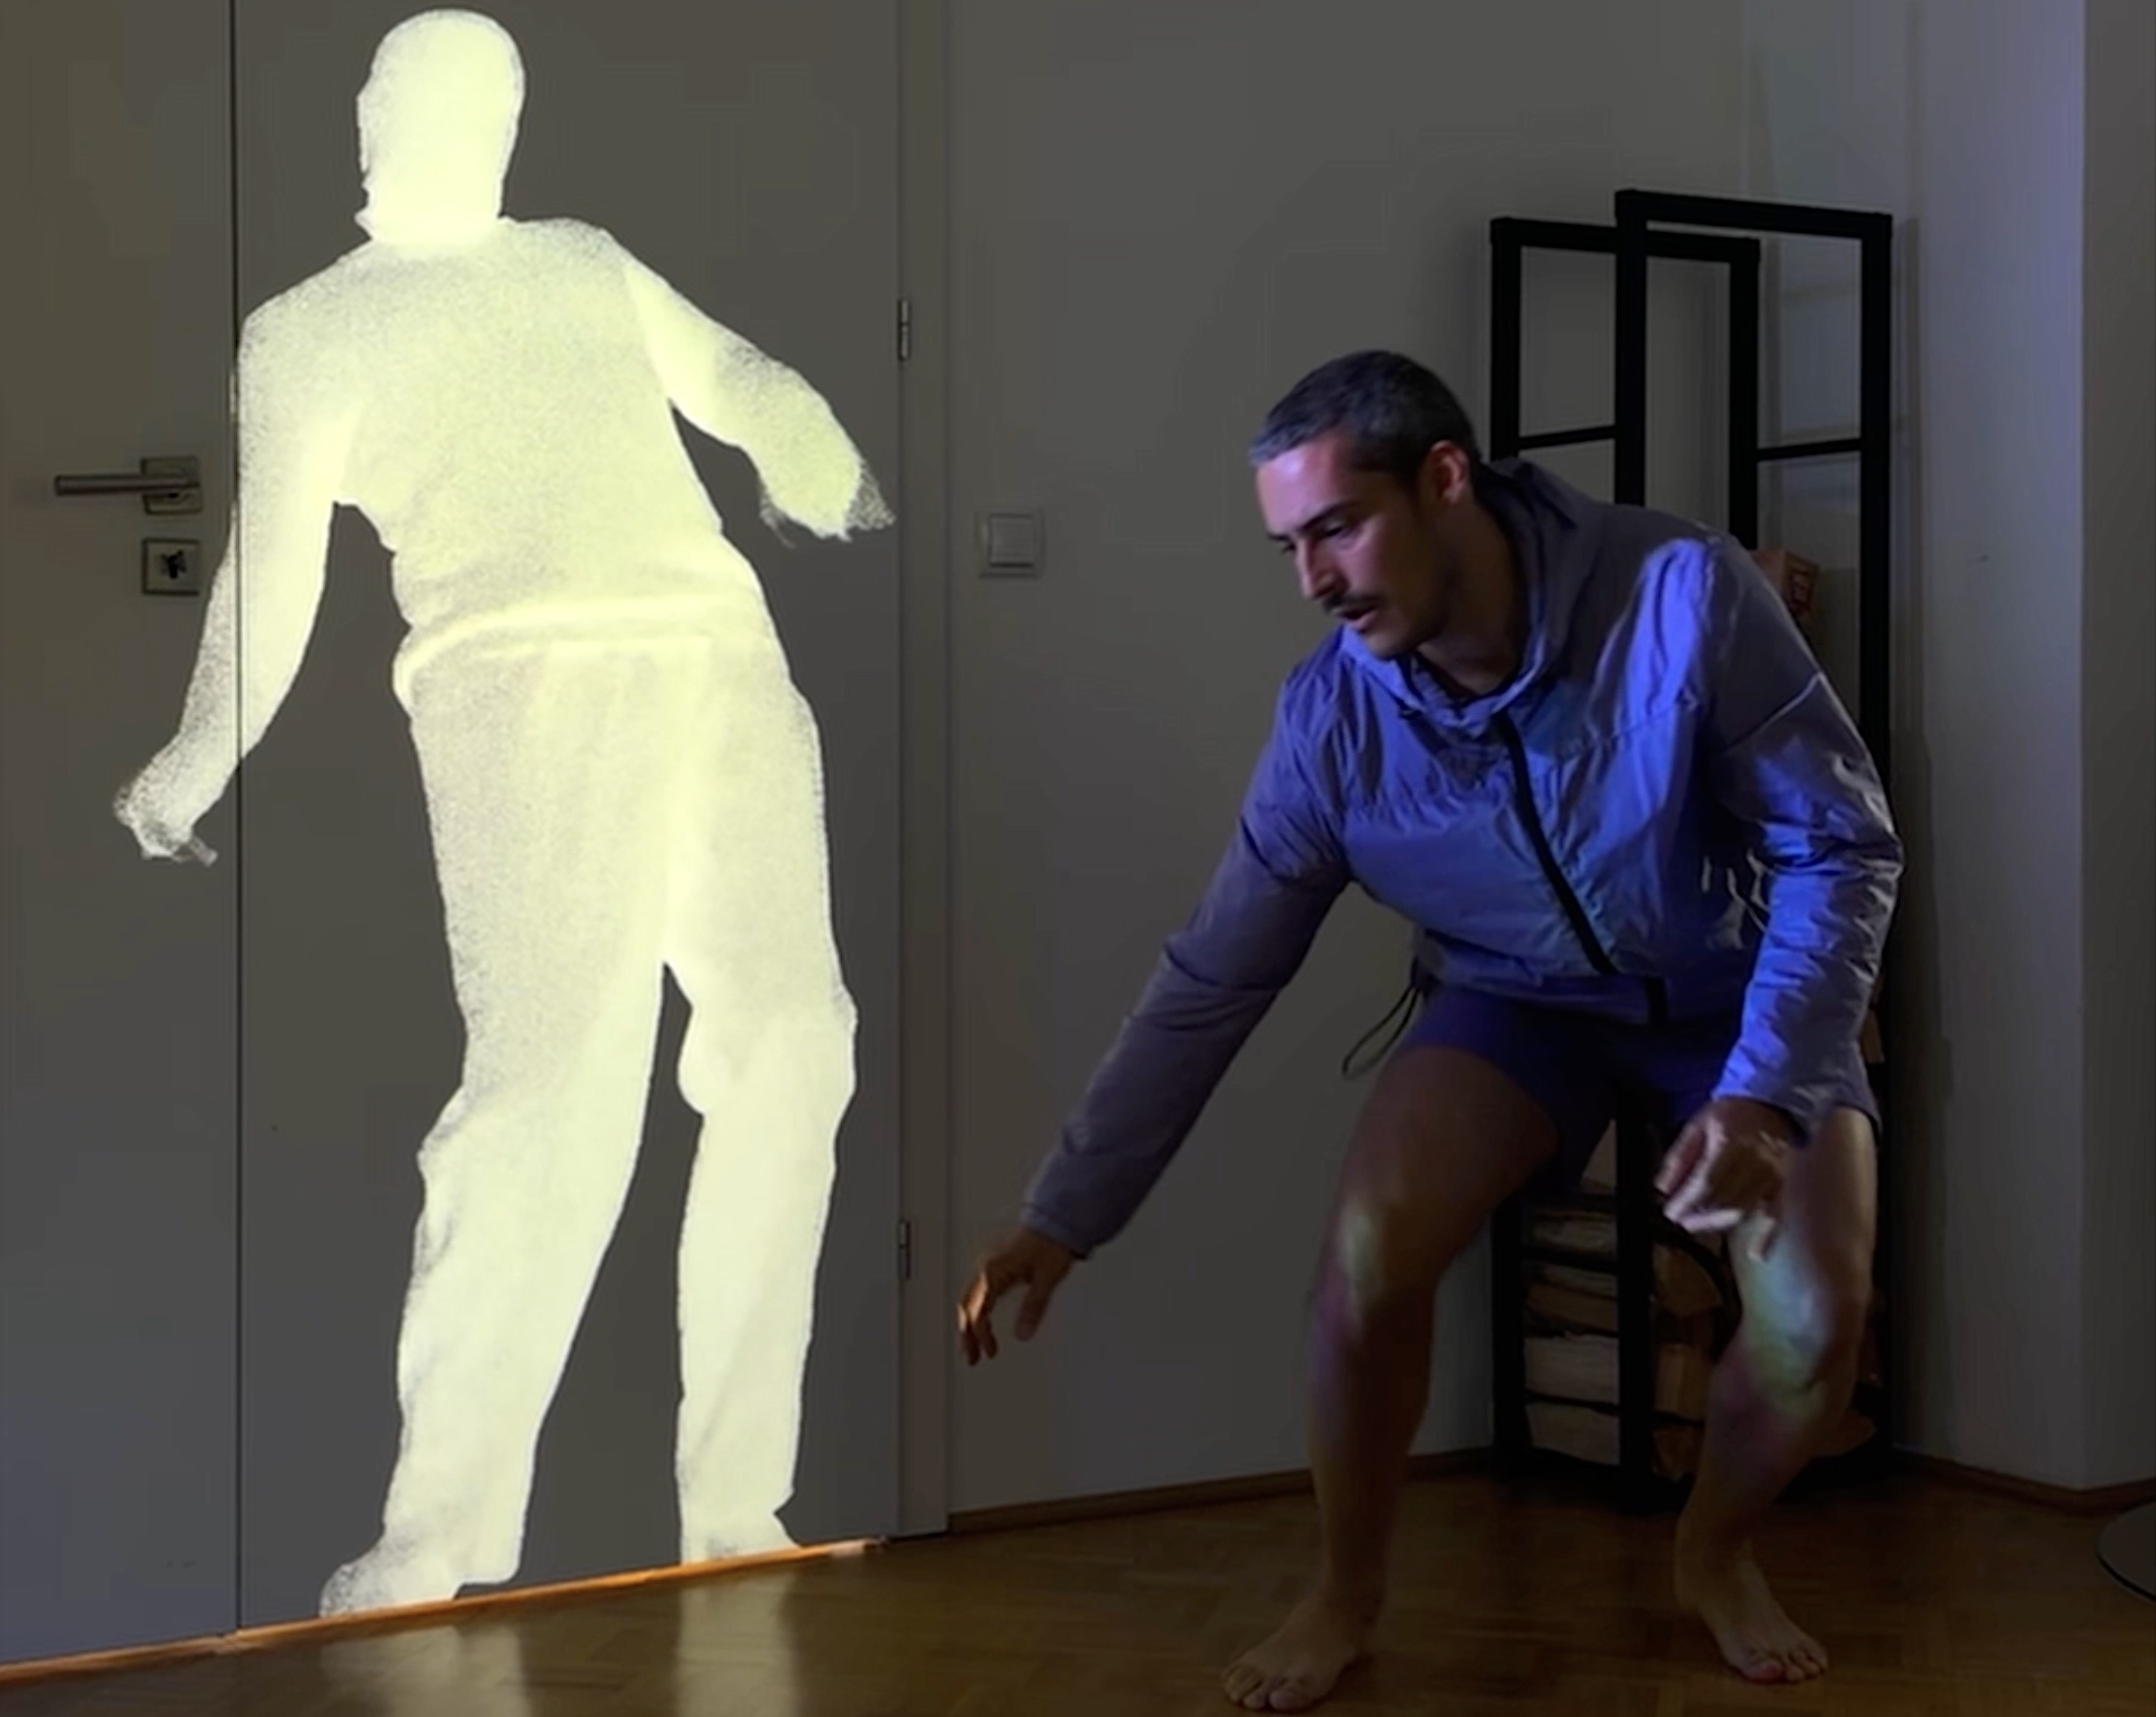
Physical Setup (Installation Thinking)
Projection
- Use wall or door (no screen needed)
- White surfaces work best
- Scale image to fit and relate to physical space
Camera Placement
Important: camera must NOT see the projection, otherwise it’ll create a feedback loop and consequently an unstable behaviour. The camera should only see the performer.
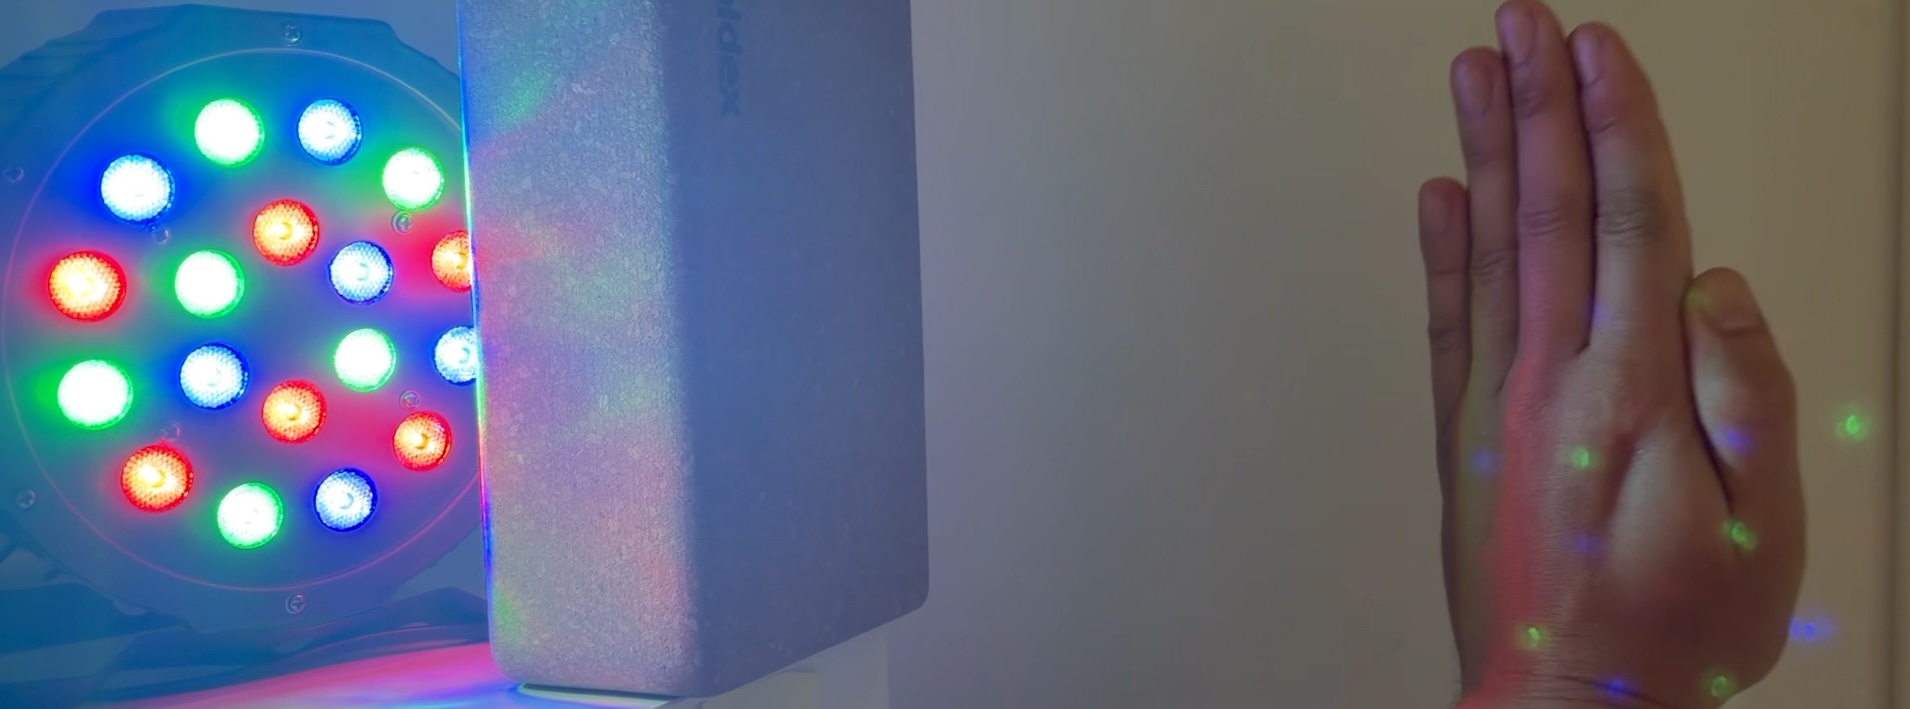
Lighting Setup
The goal is to light the performer while keeping projection clean.
- Use side lighting
- Avoid hitting projection
- Block light with simple objects (e.g., boxes)
Minimal Setup Philosophy
This project works with:
- Laptop (webcam)
- Small Budget Projector
- Basic lights
- Speakers
Built in a living room, not a studio.
Audio Setup Tips
Use built-in or simple external speakers for small spaces and avoid Bluetooth.
Why
- Bluetooth = latency
- Wired = real-time response
Space & Interaction Design
Think about:
- Performer position
- Projection placement
- Scale relationship (body vs. video)
These define the experience.
Key Takeaway
The system:
Camera → Movement → Scale → Control Video
But the art happens in:
- Video choice
- Parameter tuning
- Spatial setup
That’s what turns a patch into an experience in space.
NEXT: 1.2 Control a Talking Head with Hand Movements (mini project)
PLOC’ is realized with the support of MA7 (Cultural Department of the City of Vienna)
![]()