TL;DR
If you prefer text, below you find a list of the video’s key concepts, with images.
Concept Overview
The core idea is straightforward:
-
A camera feed captures movement
-
Movement is analyzed in real time
-
The amount of movement is translated into a numerical value
-
This value controls the speed of a video loop
This creates a direct relationship between physical motion and video behavior.
Tools Used
Key components:
-
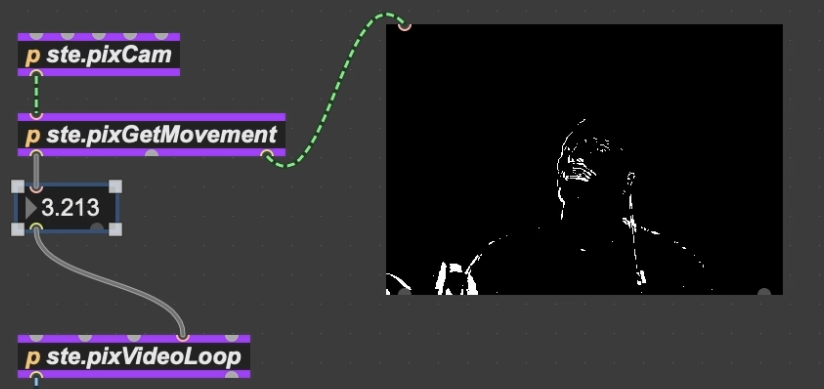
ste.pixCam→ captures camera input -
ste.pixGetMovement→ analyzes motion -
ste.smoother→ stabilizes interaction -
ste.inOutScale→ maps values -
ste.pixVideoLoop→ plays and controls video -
ste.3dWorld→ video output (included in theste.starterPack)
Step-by-Step System
1. Camera Input
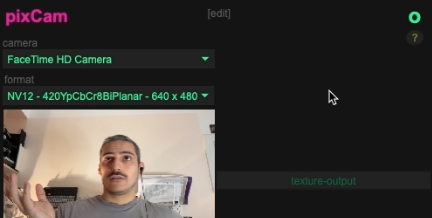
We begin by adding a camera feed using ste.pixCam.
To improve performance, the resolution is reduced (e.g., 640×480), since we don’t need to display the camera image itself.
2. Movement Detection
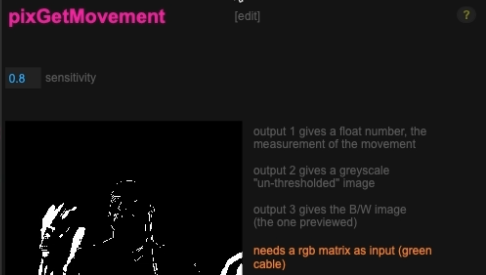
Using ste.pixGetMovement, the system compares pixels between frames to detect changes.
-
No movement → value near 0
-
More movement → higher values
This gives us a continuous numerical representation of motion.
3. Video Playback
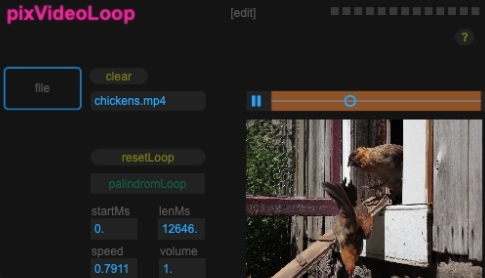
The ste.pixVideoLoop snippet loads a video (default: the “chickens” clip from Max).
Important parameter:
-
Speed
-
1= normal speed -
2= double speed -
-1= reverse
-
This is the parameter we will control with movement.
4. Direct Connection (Basic Version)
You can directly connect movement values to video speed—and it might work.
But this is mostly luck.
Why? Because:
-
Movement values depend on your environment
-
Lighting, camera angle, and distance all affect the range
So proper scaling is essential.
The Key Concept: Scaling
Input Scaling (Normalize)
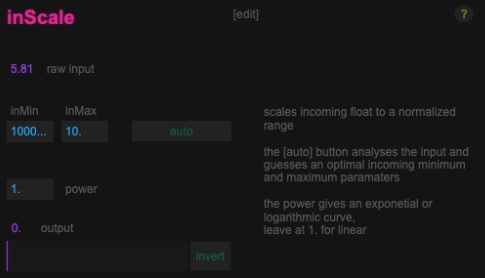
Using ste.inScale, we first normalize the movement values:
- Convert unpredictable input range → 0 to 1
This is done using:
-
Auto calibration
-
Stay still → capture minimum
-
Move naturally → capture maximum
-
This step ensures your interaction feels responsive and usable.
Output Scaling (Creative Control)
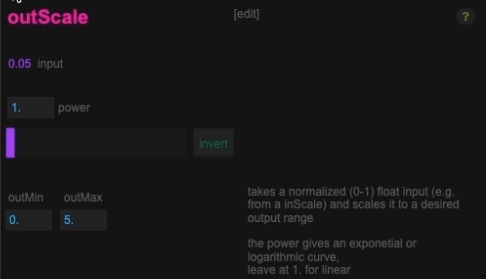
Next, we map the normalized value with the ste.outScaleto the desired output range.
Example:
-
0 → video stopped
-
1 → normal speed
-
or → 5 (very fast)
This defines the behavior and feel of your system.
Fine-Tuning Interaction
Smoothing
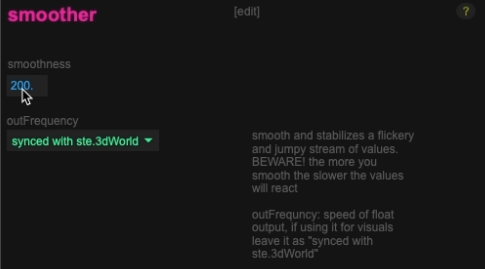
Movement data is often jittery.
Using ste.smoother:
-
Low values → responsive but shaky
-
High values → smooth but delayed
You need to find a balance between:
-
Responsiveness
-
Stability
Threshold (Noise Gate)
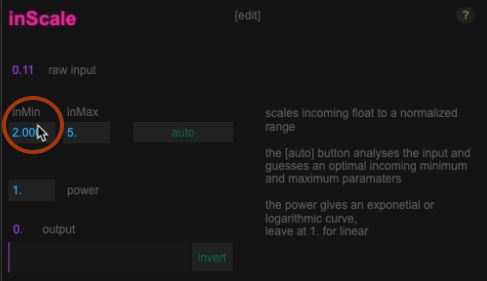
By increasing the minimum input value:
-
Small movements are ignored
-
Only stronger gestures trigger changes
This helps:
-
Avoid noise
-
Create cleaner interactions
Inversio
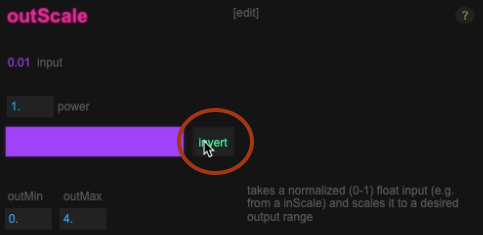
You can invert the relationship:
-
Normal → move = faster
-
Inverted → move = slower
This simple switch can completely change the interaction concept.
Interaction Design Matters
The most important part of this system is not the technical setup, it’s how you tune it.
Small parameter changes affect:
-
Effort required to interact
-
Expressiveness
-
Emotional and aesthetic feel
Examples:
-
High effort → feels heavy (like moving a rock)
-
Low effort → feels light (like controlling a feather)
Common Pitfalls
-
Calibrating too close or too far from the camera
-
Incorrect input range → unusable interaction
-
Too much smoothing → laggy system
-
Too little smoothing → jittery behavior
Performance tip
Compressed video formats (like H.264) can struggle with real-time playback when speed is constantly changing.
If you
- use longer media
- use higher resolution
- use multiple videos
Consider converting your media to real-time friendly codecs (HAP or Apple Pro Res or DNxHR) see the annex article about this.
What’s Next
This tutorial focuses on building the core system.
In the next videos, this setup will be used in real-world creative scenarios, showing how the same technique can lead to very different artistic results.
Key Takeaway
The essential workflow is:
Camera → Movement Detection → Normalize → Smooth → Scale → Control Parameter
Once you understand this chain, you can apply it to control anything in Max, not just video speed.